After creating a GPU cluster, use the cluster details page to monitor nodes, resize the cluster, manage power state, configure network interfaces, and delete cluster resources.Documentation Index
Fetch the complete documentation index at: https://gcore.com/docs/llms.txt
Use this file to discover all available pages before exploring further.
Access cluster details
To view and manage an existing cluster, open the cluster details page.- In the Gcore Customer Portal, navigate to GPU Cloud.
- In the sidebar, expand GPU Clusters and select Bare Metal GPU Clusters.
- Click on a cluster name to open the details page.
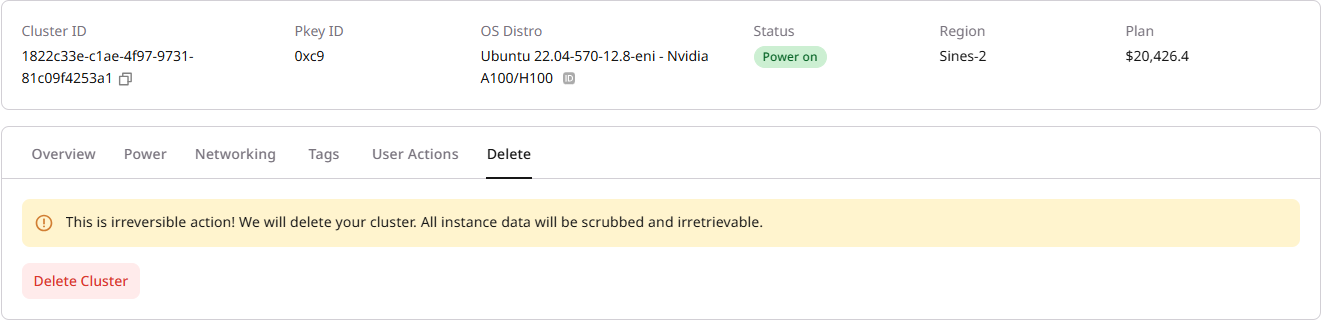
| Field | Description |
|---|---|
| Cluster ID | Unique identifier for the cluster |
| Pkey ID | InfiniBand Partition Key ID. Displayed as ”-” if InfiniBand is not configured or during cluster provisioning |
| OS Distro | Operating system image installed on all nodes |
| Status | Current cluster state |
| Region | Data center location |
| Plan | Monthly pricing plan for the cluster |
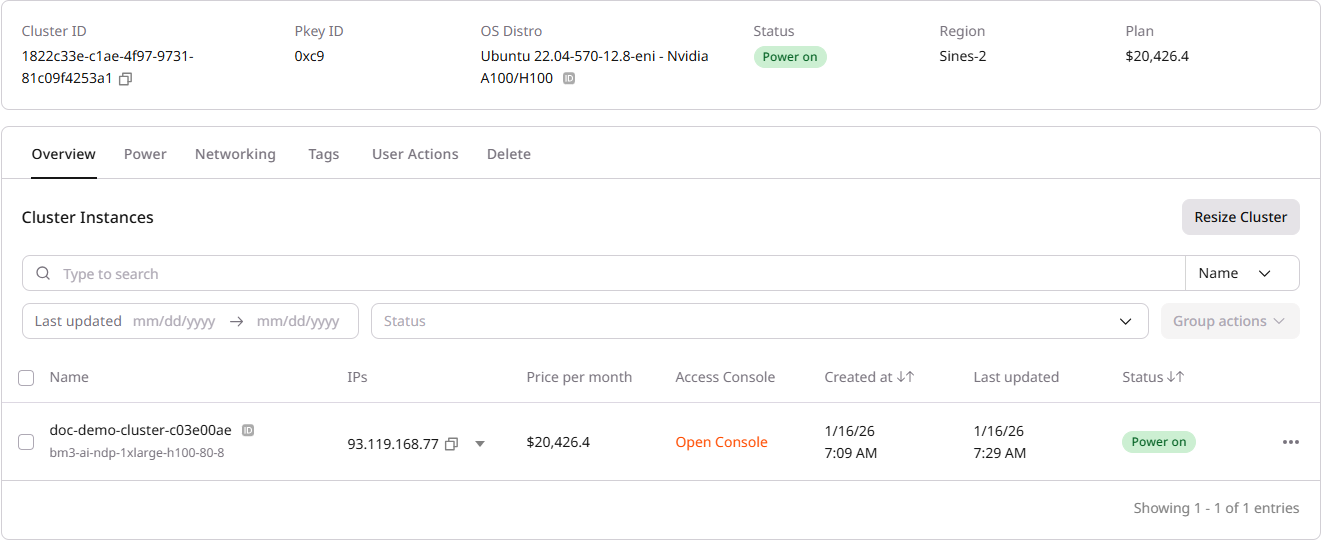
View cluster nodes
The Overview tab lists all nodes (servers) in the cluster. Each node entry shows the node name, flavor, assigned IP addresses, status, timestamps, cost, and other metadata. The table supports filtering by name, date range, and status.All nodes in a cluster share the same configuration (image, network settings, file shares) defined at cluster creation. These settings cannot be changed after the cluster is created.
Resize a cluster
Cluster size can be adjusted after creation by adding or removing nodes. To resize a cluster:- On the Overview tab, click Resize Cluster.
- Adjust the instance count using the + and - buttons.
- Click Resize.
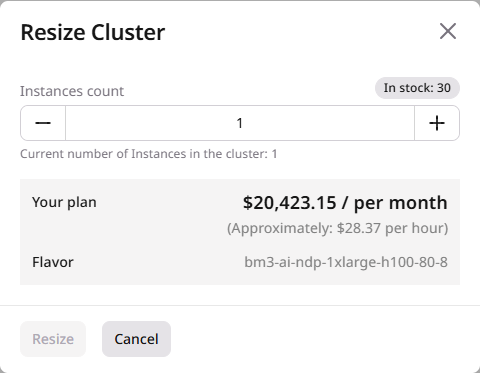
While a cluster is in the Resizing state, most management actions are unavailable. Bare Metal GPU nodes, especially H100 configurations, may take 15–40 minutes to provision.
Delete a specific node
To remove a specific node without random selection:- Locate the node in the cluster list.
- Click the actions menu (three dots) on the node row.
- Select Delete.
- Confirm the deletion.
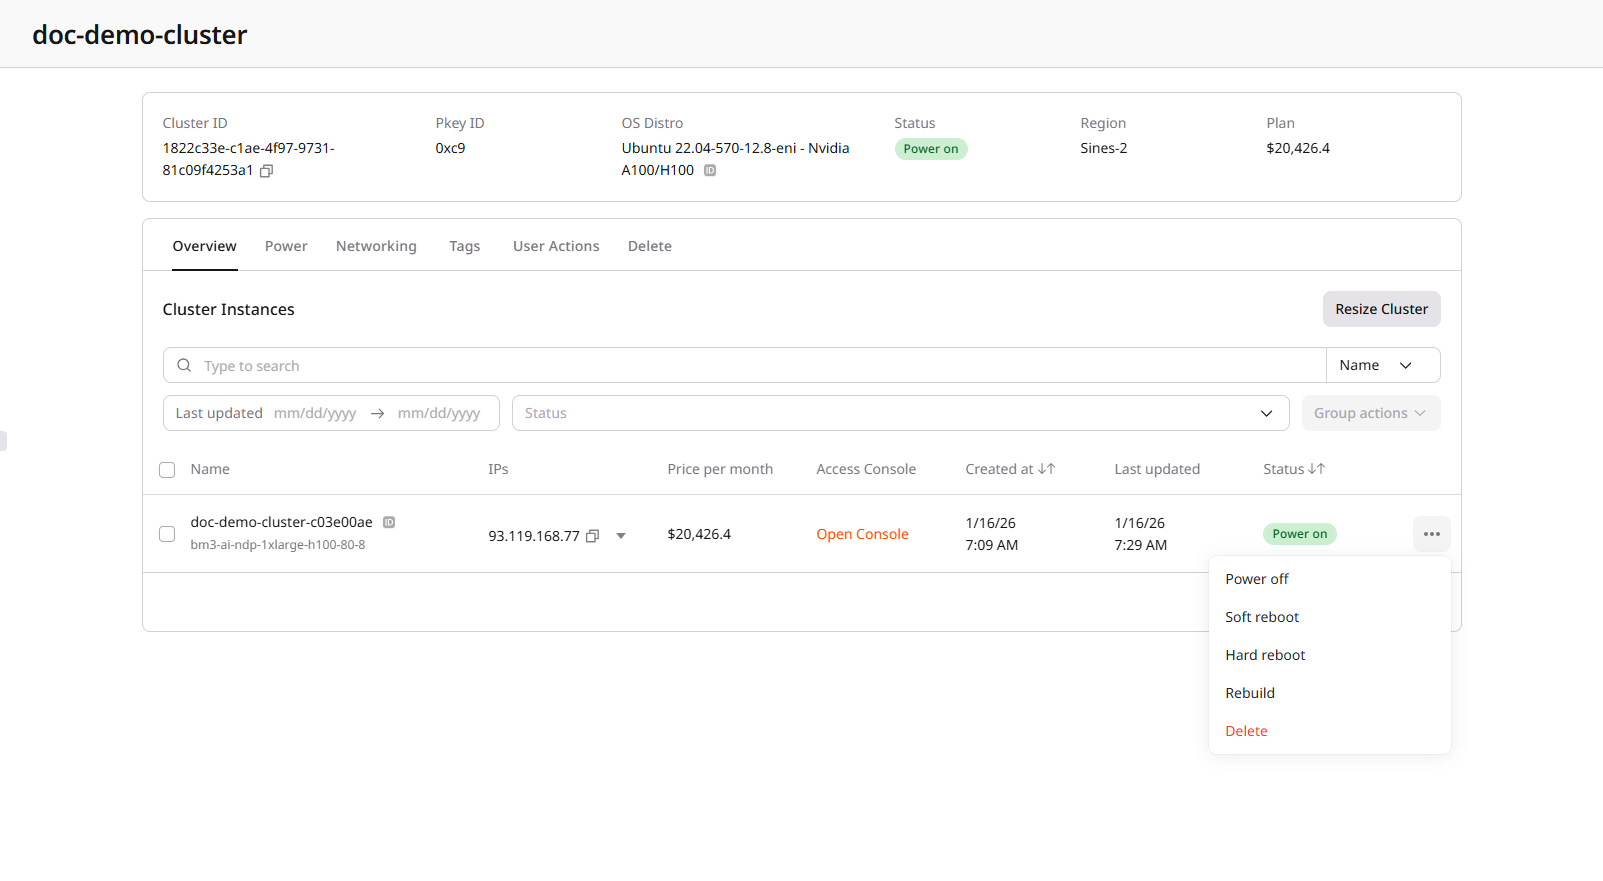
Power actions
Power actions control the running state of cluster nodes. Actions can be applied to individual nodes or in bulk.Individual node actions
To control a single node:- Locate the node in the cluster list.
- Click the actions menu (three dots) on the node row.
- Select the desired action:
- Power on: Start the node
- Power off: Shut down the node
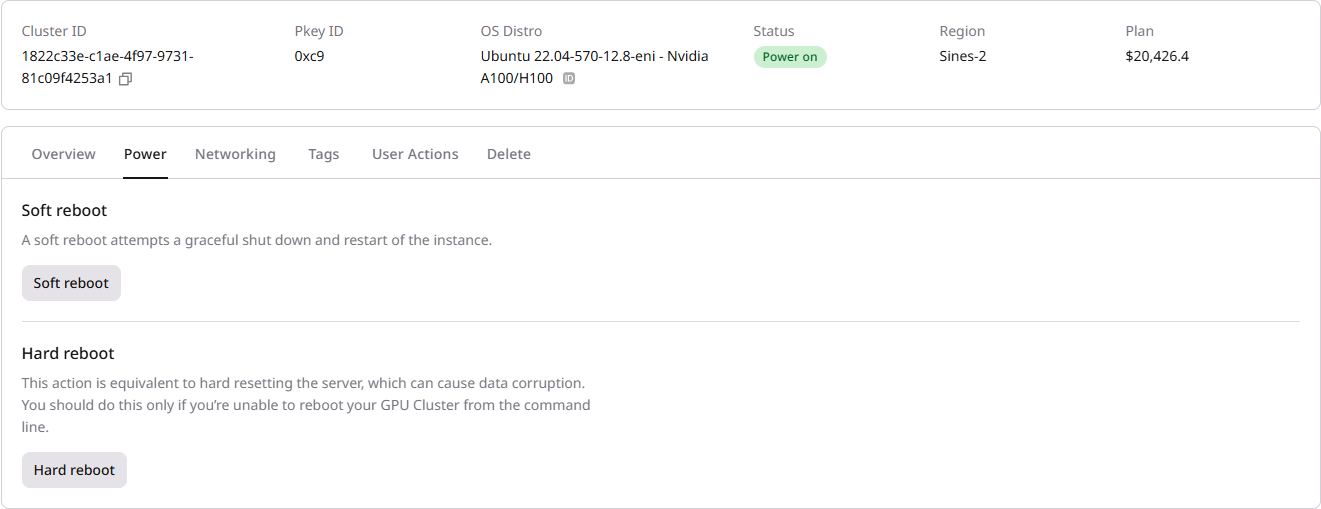
- Soft reboot: Graceful restart of the operating system
- Hard reboot: If soft reboot fails, force restart the node
- Rebuild: Reinstall the original operating system image used at cluster creation. All data on local storage is deleted.
- Replace: Delete the current node and provision a new one with the same configuration (flavor, image, network settings). Available in the UI and via the Replace bare metal GPU cluster server API endpoint. Use this to recover a node stuck in a failed state without changing the cluster setup.
Bulk actions
To apply actions to multiple nodes simultaneously:- Select nodes using the checkboxes in the nodes table.
- Click Group actions in the toolbar.
- Select the action to apply to all selected nodes.
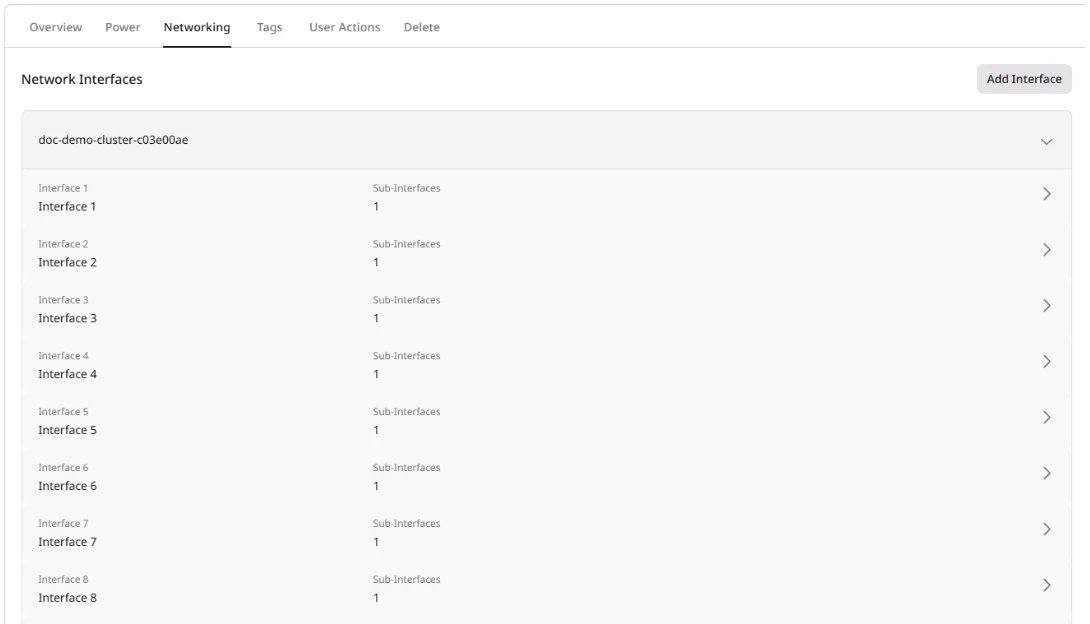
Network interfaces
The Networking tab displays network interfaces for each node. Click on a node name to expand its interface details. Interface types include:| Type | Description |
|---|---|
| Public | External IP address for internet access |
| Private | Internal network for communication with other cloud resources |
| InfiniBand | High-speed, low-latency inter-node network for GPU-to-GPU communication |
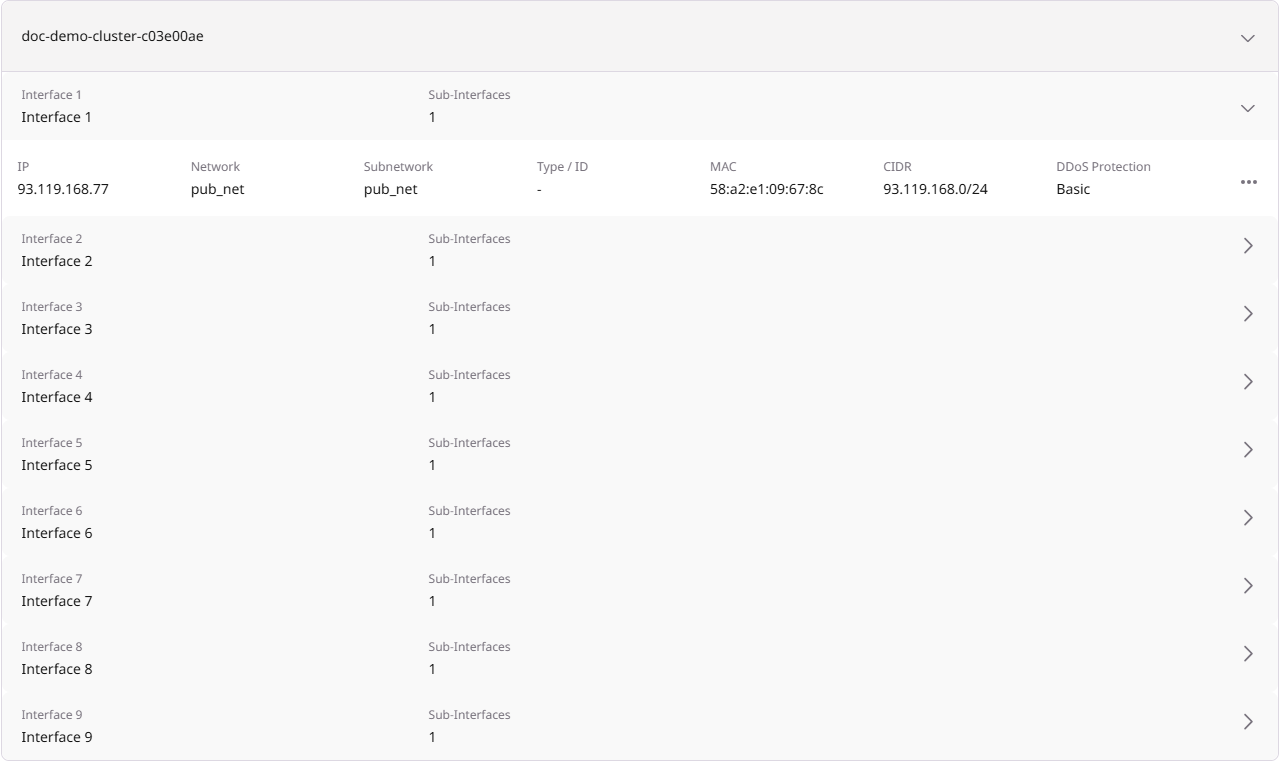
Modify network interfaces
To add network interfaces on a specific node:- Navigate to the Networking tab.
- Click on a node to expand its details.
- Click Add Interface or Add Sub-Interface.
- Configure the interface type (public or private) and IP allocation settings as supported by the service.
Only network interfaces can be modified on individual nodes after cluster creation. Image and storage configuration cannot be changed at the node level. InfiniBand interfaces are managed automatically and cannot be modified or deleted.
Console access
For troubleshooting or when SSH access is unavailable, use the browser-based console.- In the Overview tab, locate the node you want to access.
- Click Open Console in the node row.
- The console opens in a new browser tab using noVNC.
- Log in using the same credentials as for SSH access.

Tags
Tags are key-value pairs used to organize and categorize clusters. Tags are applied at the cluster level and inherited by all nodes. To manage tags:- Navigate to the Tags tab on the cluster details page.
- Enable the Add custom tags checkbox.
- Enter the key and value for each tag.
- Click Save changes.
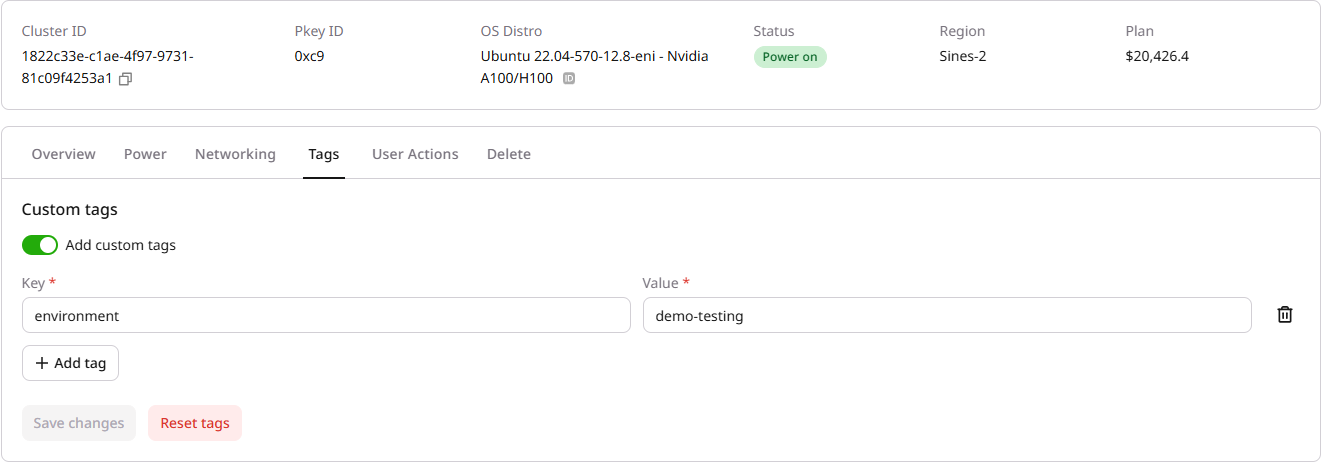
Tags can be modified even while the cluster is in the Resizing state, unlike most other management actions.
User actions
The User Actions tab displays a log of all operations performed on the cluster, including creation, deletion, resize, power, and network actions. Use the date and action type filters to narrow results. This log is useful for auditing and troubleshooting.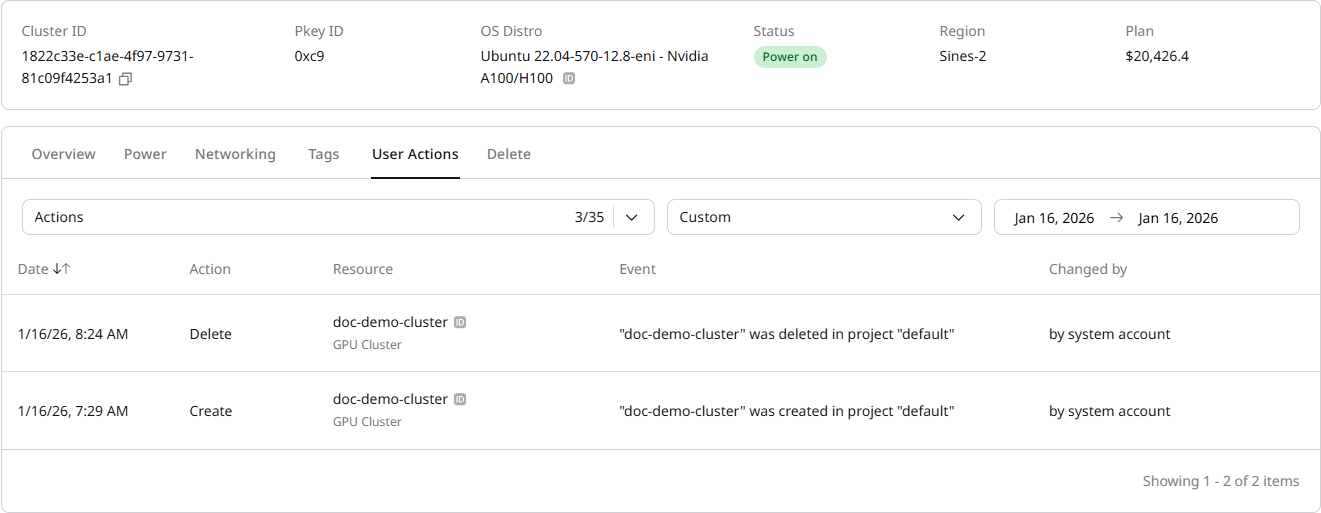
Delete a cluster
When a cluster is deleted, local NVMe storage is permanently erased; file shares and object storage remain intact. To delete a cluster:- Navigate to the Delete tab on the cluster details page.
- Click Delete Cluster.
- Confirm the deletion.
Automating cluster management
The Gcore Customer Portal is suitable for managing individual clusters. For automated workflows—such as CI/CD pipelines, infrastructure-as-code, or batch provisioning—use the GPU Bare Metal API. The API allows:- Starting, stopping, and rebooting cluster nodes
- Resizing clusters and replacing individual nodes
- Managing network interfaces on cluster servers
- Deleting clusters and individual nodes programmatically